Post by Linaeve on Jul 13, 2007 17:38:48 GMT -5
I felt like sharing about what goes on behind the scenes when I prepare for the release of a new species. Most of it is technical, program-oriented things, and it took me a year just to figure out how to use layers, but once I got past that point it was pretty easy to discover all the tricks in making a template.
Recipe for a Pykiin Template
Ingredients:
1 drawing tablet with lots of funky decorations

1 computer
1 drawing program with layers
2 cups Chai tea

3 tbsp. artistic talent
1 cup imagination
5 cups time
10 cups patience
Process
First, simmer the imagination for a few days. When it turns to an idea, mix in the artistic talent and stir thoroughly with the tablet pen.

Nope, that's not good enough. Keep stirring.

That's better! With your art program, zoom in to 300% and use the tablet pen to add 2 cups of time and 3 cups of patience.

When your mixture has turned to a nice, crispy, cajun black, find your magic wand.

Use the magic wand to cheat a little. This saves you time and patience, both of which are expensive items. Click outside your neat little mixture to select everything outside of it, then invert the selection so that instead of highlighting the area outside it, you've now highlighted your mixture. Shrink the highlighted layer some more, then convert it to an object so that you can use it as a layer to draw on.

Now, add a few drops of really bright food coloring. This is how you start the cleanup process, which makes sure that none of your new layer bled beyond the original mixture. Zoom back in to 300% and use the eraser tool to clean up those little spots where the layer is being uncooperative.

The magic wand tool is a very helpful tool, but it doesn't always work. For the trickier layers, such as the complex lineart of the fur tufts, start a new layer and paint over them. Don't worry too much about neatness, but be sure to stay inside your lineart.

Once you have all the fur tufts filled in, double-check! Make sure you didn't forget anything, because once you make that new layer you can't add anything to it. You can erase all you want, but you can't add any more surface area (or at least, not in this program). Then, click on your selection tool, or normal cursor button, to finish the layer and drag it underneath your lineart layer.

Repeat the aforementioned technique for all layers that are too finicky for your magic wand. Add another 2 cups of time and 5 cups of patience. You'll need them. Stir thorougly with the tablet pen.
When you have all your layers - this particular example has ten, not including the invisible sketch layers - lock them all so they won't move around on you, and make sure they all have names so they're organized and easy to find.

Now that your recipe is a jumble of annoying colors, add more food coloring to all of your layers until they are all exactly the same. You'll need this so that when airbrushing the shading on to your mixture, you'll have a nice even coat and won't accidentally overdo it on certain color areas.

Once you have your handy-dandy airbrush, add any remaining patience. You may have to add more artistic skill and time to get the desired consistiency.
When you're finished, you'll have a nice shiny kiin

Repeat the previous step with a black airbrush to finish off your template. Bake for a good two-three hours, just to give you a break from the same template for too long. When its finished, you can come back and play with colors some more.

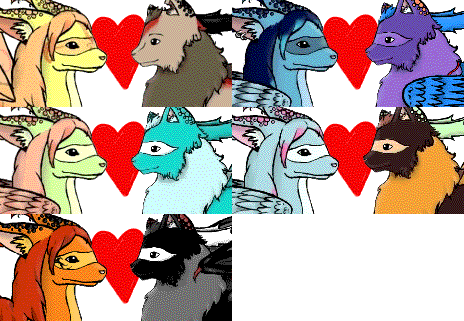
Ta-da! Your creation is ready to get its unique colors and certificate before wandering into the Valley in search of a guardian.
Recipe for a Pykiin Template
Ingredients:
1 drawing tablet with lots of funky decorations

1 computer
1 drawing program with layers
2 cups Chai tea

3 tbsp. artistic talent
1 cup imagination
5 cups time
10 cups patience
Process
First, simmer the imagination for a few days. When it turns to an idea, mix in the artistic talent and stir thoroughly with the tablet pen.

Nope, that's not good enough. Keep stirring.

That's better! With your art program, zoom in to 300% and use the tablet pen to add 2 cups of time and 3 cups of patience.

When your mixture has turned to a nice, crispy, cajun black, find your magic wand.

Use the magic wand to cheat a little. This saves you time and patience, both of which are expensive items. Click outside your neat little mixture to select everything outside of it, then invert the selection so that instead of highlighting the area outside it, you've now highlighted your mixture. Shrink the highlighted layer some more, then convert it to an object so that you can use it as a layer to draw on.

Now, add a few drops of really bright food coloring. This is how you start the cleanup process, which makes sure that none of your new layer bled beyond the original mixture. Zoom back in to 300% and use the eraser tool to clean up those little spots where the layer is being uncooperative.

The magic wand tool is a very helpful tool, but it doesn't always work. For the trickier layers, such as the complex lineart of the fur tufts, start a new layer and paint over them. Don't worry too much about neatness, but be sure to stay inside your lineart.

Once you have all the fur tufts filled in, double-check! Make sure you didn't forget anything, because once you make that new layer you can't add anything to it. You can erase all you want, but you can't add any more surface area (or at least, not in this program). Then, click on your selection tool, or normal cursor button, to finish the layer and drag it underneath your lineart layer.

Repeat the aforementioned technique for all layers that are too finicky for your magic wand. Add another 2 cups of time and 5 cups of patience. You'll need them. Stir thorougly with the tablet pen.
When you have all your layers - this particular example has ten, not including the invisible sketch layers - lock them all so they won't move around on you, and make sure they all have names so they're organized and easy to find.

Now that your recipe is a jumble of annoying colors, add more food coloring to all of your layers until they are all exactly the same. You'll need this so that when airbrushing the shading on to your mixture, you'll have a nice even coat and won't accidentally overdo it on certain color areas.

Once you have your handy-dandy airbrush, add any remaining patience. You may have to add more artistic skill and time to get the desired consistiency.
When you're finished, you'll have a nice shiny kiin


Repeat the previous step with a black airbrush to finish off your template. Bake for a good two-three hours, just to give you a break from the same template for too long. When its finished, you can come back and play with colors some more.

Ta-da! Your creation is ready to get its unique colors and certificate before wandering into the Valley in search of a guardian.

